Account Setup Guide
Welcome to Centrali! This guide will help you get your account set up and ready to start building.
Step 1: Create Your Account and Workspace
Visit centrali.io to create your account.
- Click the "Get Started" button on the landing page
- Fill in your account details, including your workspace name
- Workspace Name: A friendly name for your project (e.g., "My App Production")
- A workspace slug will be automatically generated from your workspace name (e.g.,
my-app-production)- The slug is a unique identifier used in API URLs
- Must be lowercase letters, numbers, and hyphens only
- Cannot be changed after creation
- Example:
my-app-productionbecomeshttps://api.centrali.io/data/workspace/my-app-production/...
- Submit the signup form — your account and first workspace are created together
- Open the verification email from Centrali
- Self-serve signup emails are now verify-only
- After you verify the address, Centrali signs you in automatically with a magic link and lands you in the workspace you just created
- If an admin invited you instead of self-signing up:
- You may receive a password-setup step before your first login
- Admin-invited users still follow the invitation flow rather than the self-serve auto-login flow
For pricing information and plan details, visit the Centrali pricing page.
What is a Workspace?
A workspace is an isolated environment for your application. Each workspace has: - Separate data: Collections and records are isolated - Separate billing: Each workspace is billed independently - Separate team access: Invite team members per workspace - Separate credentials: Service accounts are workspace-scoped
You can create additional workspaces later for different projects or environments (e.g., my-app-dev, my-app-staging, my-app-prod).
Step 2: Create a Service Account
Service accounts are the recommended way to authenticate with Centrali's API and SDK.
What is a Service Account?
A service account is a machine-to-machine authentication method that: - Works for API and SDK: Use the same credentials for all integrations - Is workspace-scoped: Each workspace has its own service accounts - Can be rotated: Regenerate credentials without changing code - Has fine-grained permissions: Control what each service account can do via group membership
Creating Your First Service Account
From the Dashboard:
- Navigate to Your Workspace
-
Select the workspace you just created
-
Open the Service Accounts section
-
In the console, open the area where service accounts are managed for your workspace
-
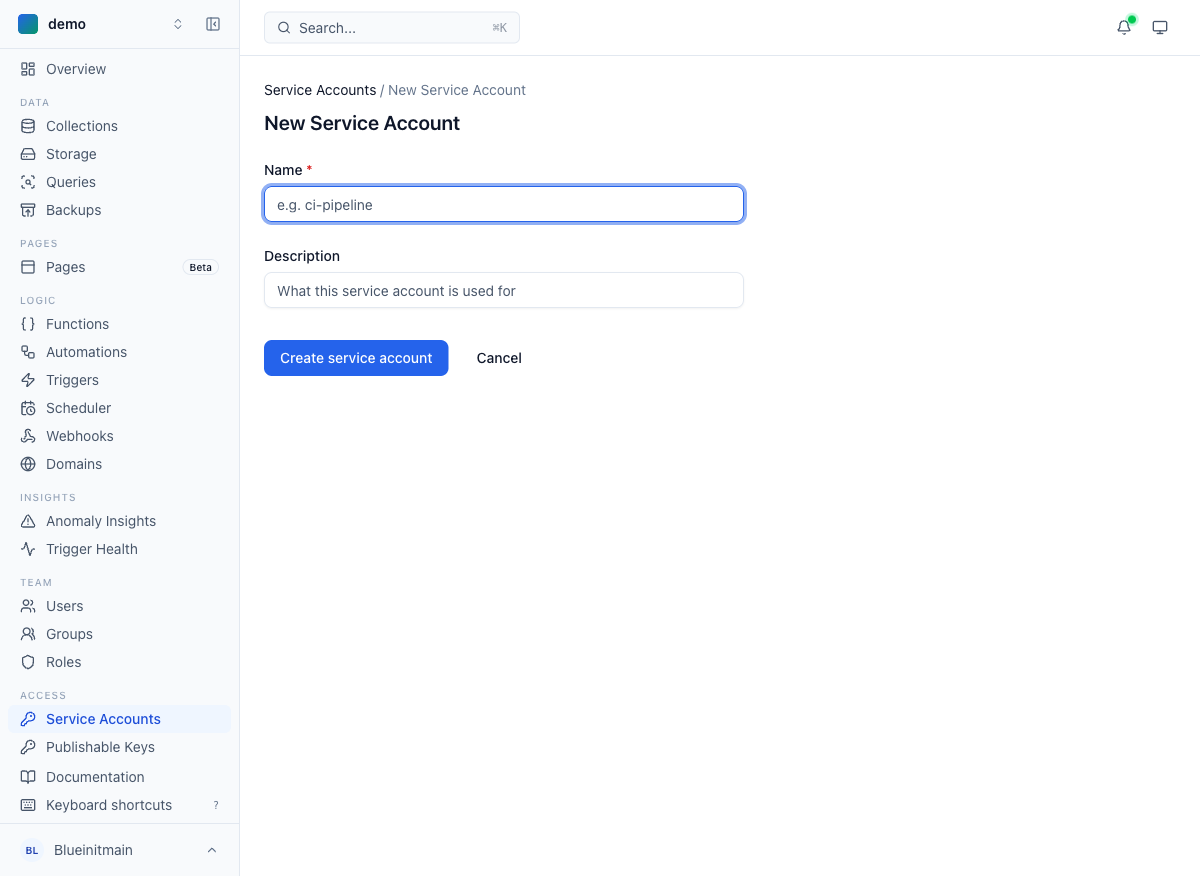
Create Service Account
- Click "Create Service Account"
- Enter a descriptive name (e.g., "Development", "Production API", "CI/CD")
-
Optionally add a description
-
Save Your Credentials
- You'll receive a
client_idandclient_secret - Important: The
client_secretis shown only once! - Copy both values and store them securely
Example Credentials:
client_id: ci_a1b2c3d4e5f6g7h8i9j0
client_secret: sk_0123456789abcdef0123456789abcdef0123456789abcdef0123456789abcdef
Assign Your Service Account to a Group
Service accounts need group membership to have permissions. After creating the service account:
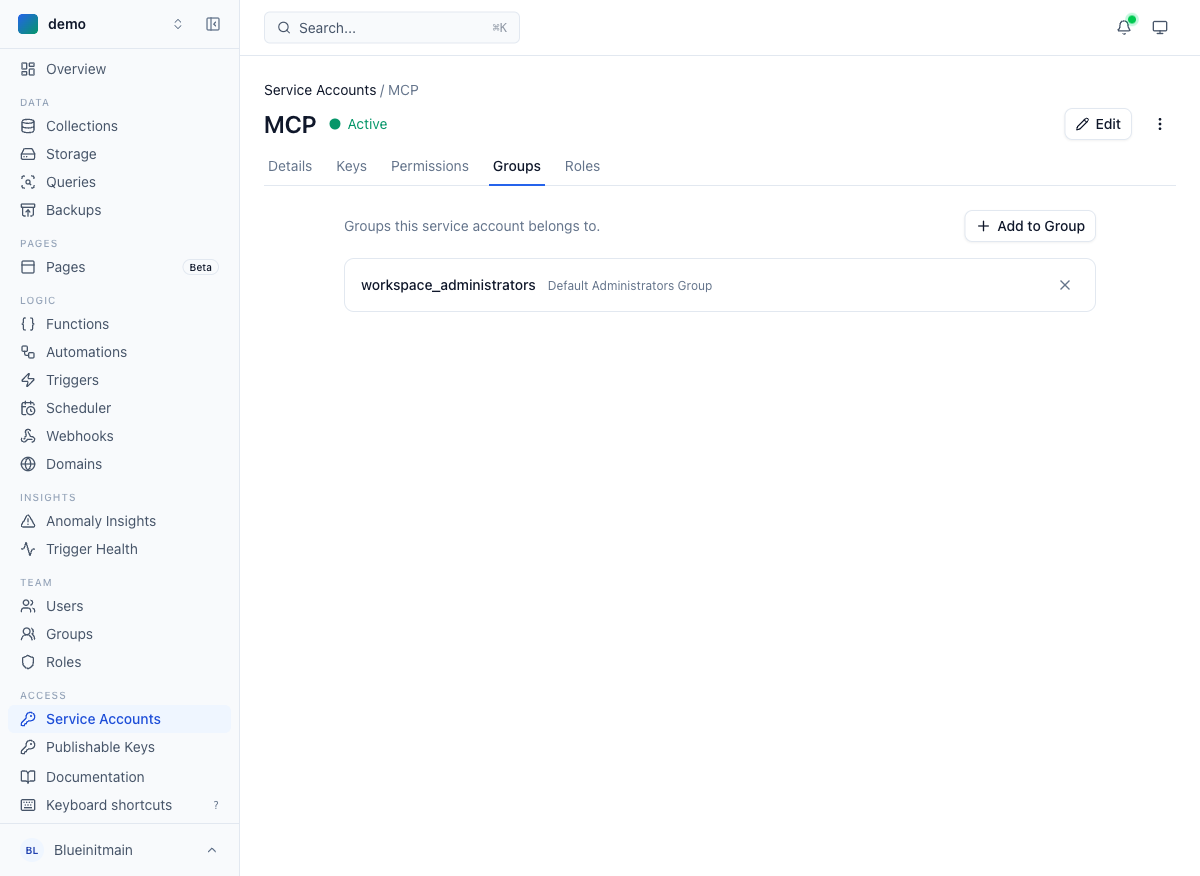
- Create or select a group — Go to the IAM section and find your groups
- Add the service account to the group — Assign the service account as a member
- Ensure the group has the correct permissions — The group's policies determine what the service account can do
Super Admin Access
If you need the service account to have full administrative access, add its group to the workspace_administrators group. This grants all permissions within the workspace.
Storing Credentials Securely
Development: Use environment variables:
# .env file (never commit to git!)
CENTRALI_CLIENT_ID=ci_a1b2c3d4e5f6g7h8i9j0
CENTRALI_CLIENT_SECRET=sk_0123456789abcdef...
CENTRALI_WORKSPACE_SLUG=my-app-prod
Production: Use a secrets management service: - AWS Secrets Manager - Google Secret Manager - Azure Key Vault - HashiCorp Vault - Your platform's environment variables (Vercel, Netlify, Railway, etc.)
Never: - ❌ Commit credentials to git - ❌ Hardcode in source code - ❌ Share via email or chat - ❌ Store in plain text files
Step 3: Test Your Setup
Verify your service account works with a simple API call:
# Set your credentials
export CENTRALI_CLIENT_ID="ci_your_client_id"
export CENTRALI_CLIENT_SECRET="sk_your_client_secret"
export CENTRALI_WORKSPACE_SLUG="your-workspace-slug"

# Get an access token
curl -X POST "https://auth.centrali.io/oauth/token" \
  -H "Content-Type: application/x-www-form-urlencoded" \
  -d "grant_type=client_credentials" \
  -d "client_id=$CENTRALI_CLIENT_ID" \
  -d "client_secret=$CENTRALI_CLIENT_SECRET" \
  -d "scope=openid"
Expected Response:
{
  "access_token": "eyJhbGciOiJSUzI1NiIsInR5cCI6IkpXVCJ9...",
  "token_type": "Bearer",
  "expires_in": 3600,
  "scope": "openid"
}
If you receive a token, you're all set! 🎉
Step 4: Use the SDK (Recommended)
The Centrali SDK handles authentication automatically:
import { CentraliSDK } from '@centrali-io/centrali-sdk';

const centrali = new CentraliSDK({
  baseUrl: 'https://api.centrali.io',
  workspaceId: process.env.CENTRALI_WORKSPACE_SLUG, // current SDK option name; pass the workspace slug
  clientId: process.env.CENTRALI_CLIENT_ID,
  clientSecret: process.env.CENTRALI_CLIENT_SECRET
});

// The SDK automatically fetches and manages tokens
// You can now make API calls:
const products = await centrali.records.query('Product', {
  page: { limit: 10 }
});
See the SDK Guide for complete documentation.
Alternative: Create Service Account via API
If you prefer to automate service account creation, you can use the API.
Prerequisites: - You must authenticate as a user first - You'll need a user JWT token with permission to create service accounts
See the Service Account Authentication Guide for detailed API instructions.
Next Steps
Now that your account is set up:
- Quick Start Guide - Build your first API in 10 minutes
- Understanding Your Workspace - Learn about workspace concepts
- Authentication Overview - Understand authentication flows
- SDK Guide - Learn to use the official SDK
Troubleshooting
Can't create a workspace
- Check your account status: Ensure your email is verified
- Plan limits: Free tier may have workspace limits
- Contact support: Reach out if issues persist
Service account credentials not working
- Check credentials: Ensure no extra spaces or line breaks
- Verify workspace slug: Credentials are workspace-specific
- Token endpoint: Must use
https://auth.centrali.io/oauth/token - See troubleshooting: Authentication Troubleshooting
Lost client_secret
- Cannot retrieve: Client secrets are shown only once during creation
- Solution: Rotate the service account to get a new secret
- In the console: Open the service account details page and rotate the secret
Security Best Practices
✅ Do: - Store credentials in environment variables or secret managers - Use separate service accounts for dev/staging/production - Rotate credentials regularly (every 90 days recommended) - Use different service accounts for different applications - Monitor service account usage for unusual activity
❌ Don't: - Commit credentials to version control - Share credentials via email or messaging - Use the same credentials across all environments - Give service accounts more permissions than needed
Getting Help
- Documentation: API Reference
- Examples: Quick Start
- Authentication: Service Account Guide
- Support: Contact your workspace administrator or Centrali support
Ready to build? Head to the Quick Start Guide! →